Members Login
Username 
 
Password 
    Remember Me  
Post Info TOPIC: Bob T's 59 Elky project


BRANT COUNTY, ONT

Status: Offline
Posts: 1155
Date:
Bob T's 59 Elky project
Permalink Closed


Bob has agreed to let me post some pics about his 59's  paint/body project he has brought to the shop.  I've known Bob since he pulled into my Parents driveway 25 yrs ago when I was still a kid in my late teens.  He needed Nova parts and someone told him about me??  I sold him the parts and we've been friends ever since.  Bob's always taken on the never ended task of trying to enlighten me in the ways of old school Hotrods and I'm always crying the blues to him over my little projects that turned into body off resto's!!  Anyways....Here's what Bob brought to the shop.

Not a bad looking ride! He wanted a couple things fixed up.  Some small rust bubbles and a dent.

Well as we got into the project, which he was told was a late 70's resto, I found lots of paint layers and filler.  The car was nice but it had it's fair share of waves all round.  Bob decided to paint everything under the roof.  Keep in mind as we go along that while this is a rare peice, we are not trying to win the riddler or create a master piece with all NOS panels etc.  Our goal here is as Bob puts it "to get it to a point that won't embarrass either of us". Bob likes to drive his rides as well. No trailer queens in his garage. 

We were supposed to keep it simple but as Bob knows...I always seem to take things to the next levelconfuseconfuse I pulled all the trim, and had my boys strip all the multiple layers of paint/primer and the reason for the waves.....a gallon of lacquer putty.

That's it for now....

Stay tuned for more action!biggrinbiggrinbiggrin

Rich"slab"Davis


-- Edited by slab on Sunday 15th of July 2012 08:17:52 AM


-- Edited by slab on Sunday 15th of July 2012 08:18:52 AM

__________________

slab----67 chevy II 2dr post and 66 chevy II hardtop

plus the kids 87 Camaro and 68 SS Camaro


ONTARIO

Status: Offline
Posts: 194
Date:
Permalink Closed

Looks great Rich.biggrin The best part is, that I now have documented evidence that you are gettin' "OLD". eyepopping.gif 
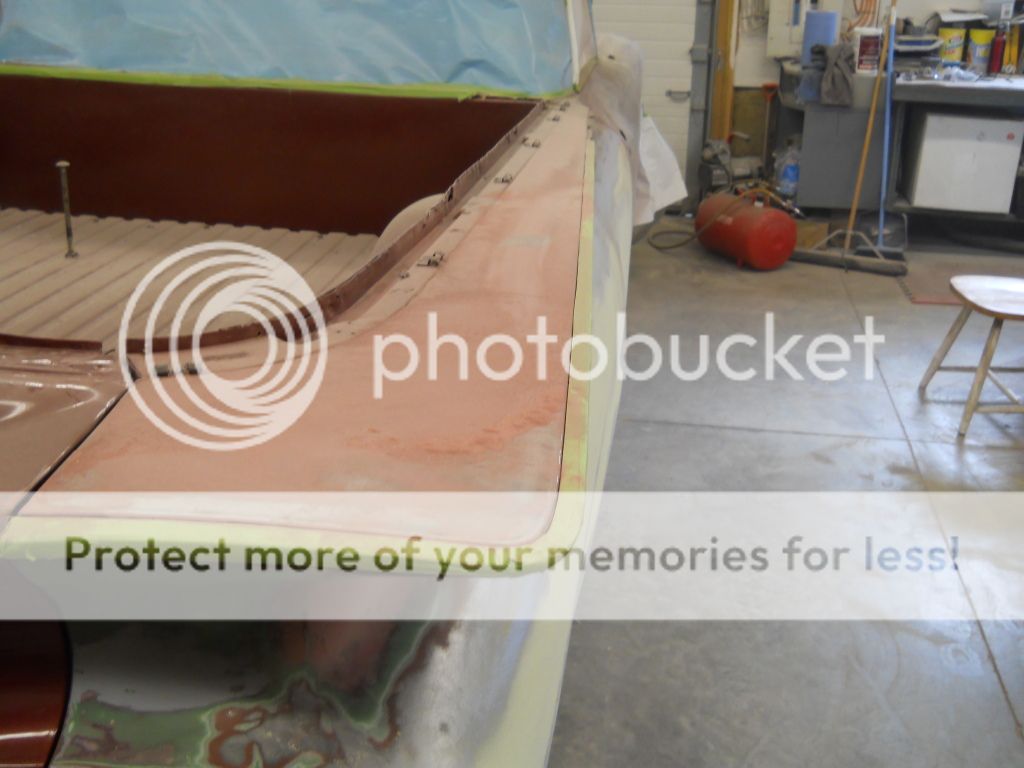
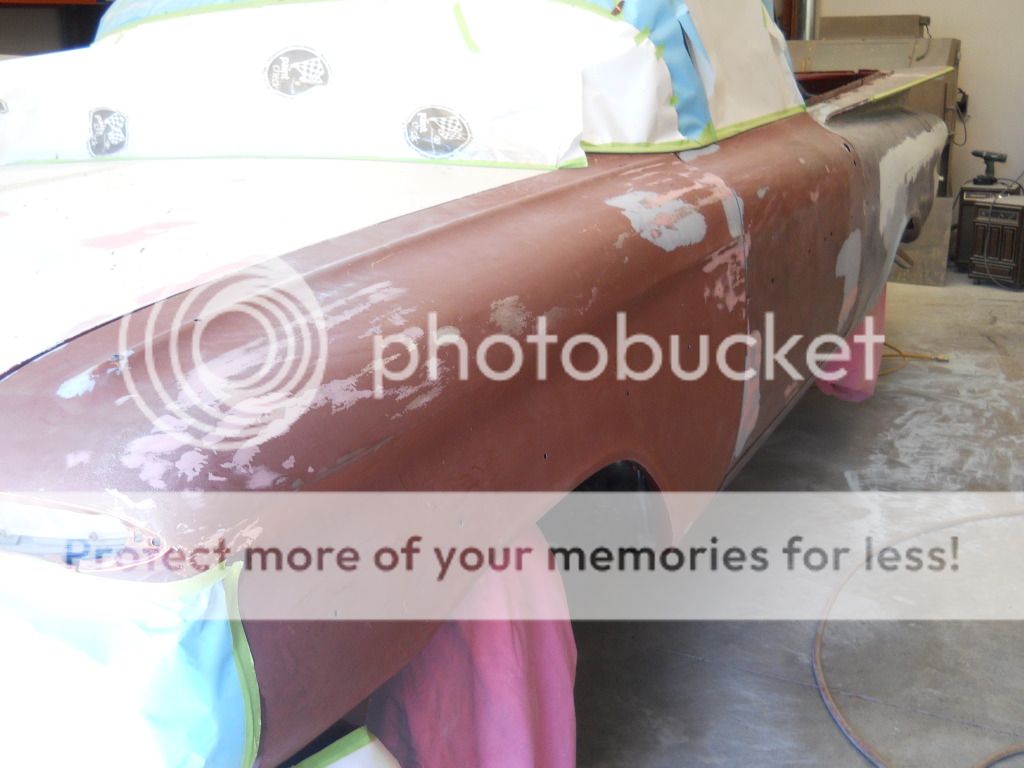
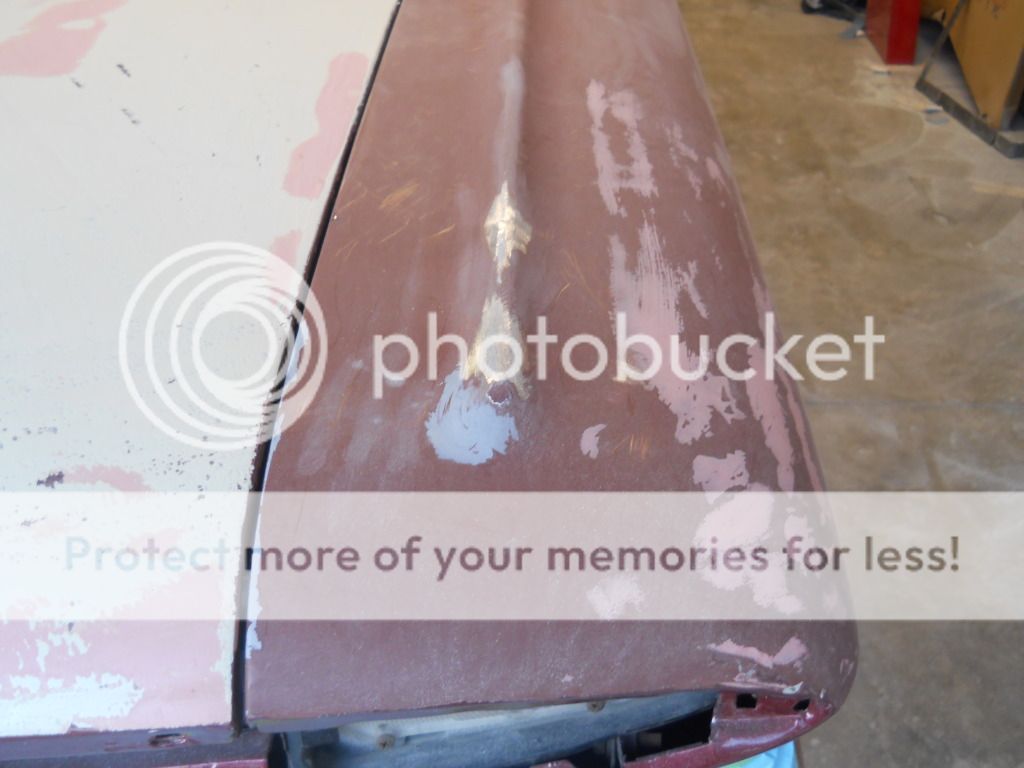
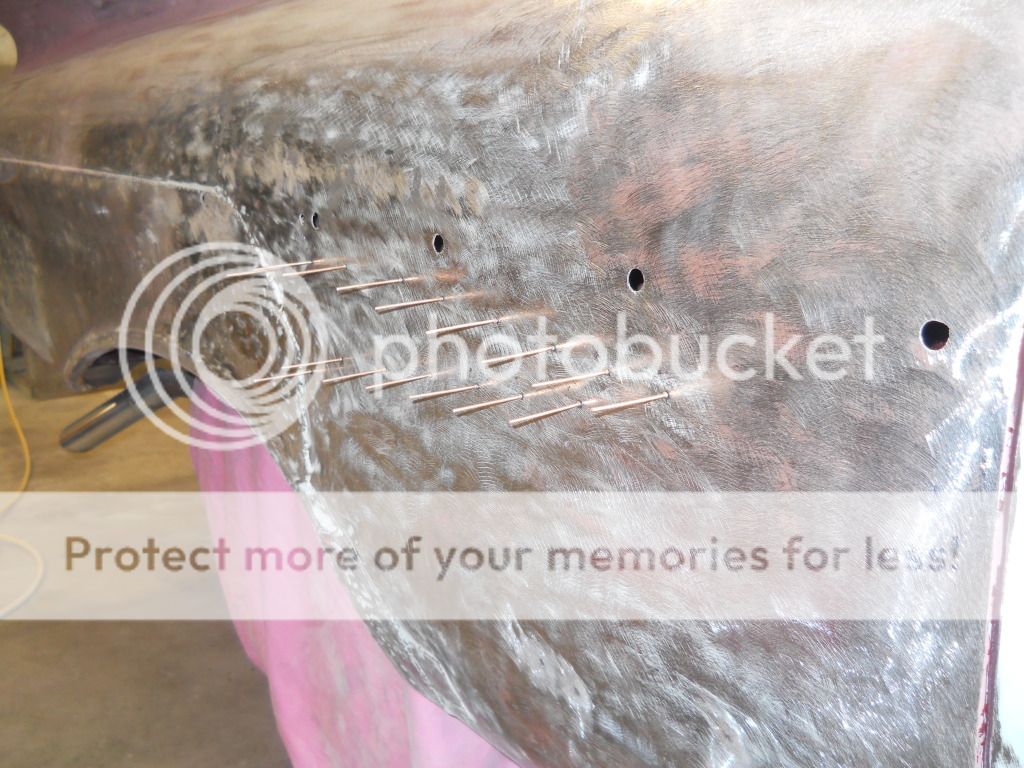
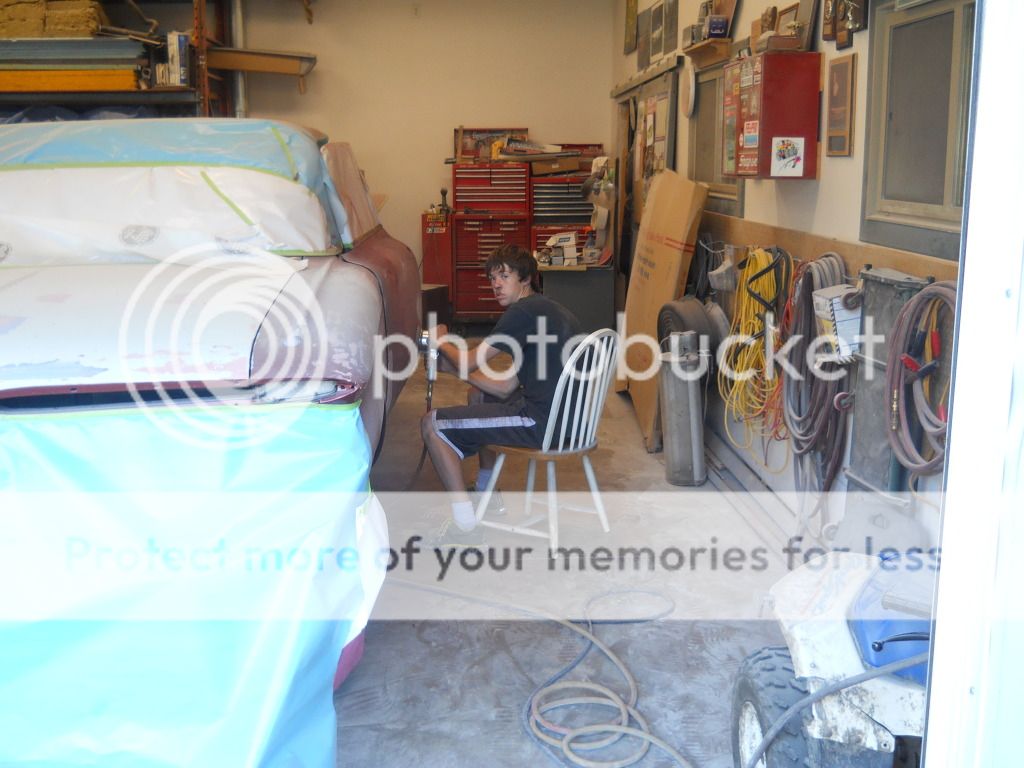
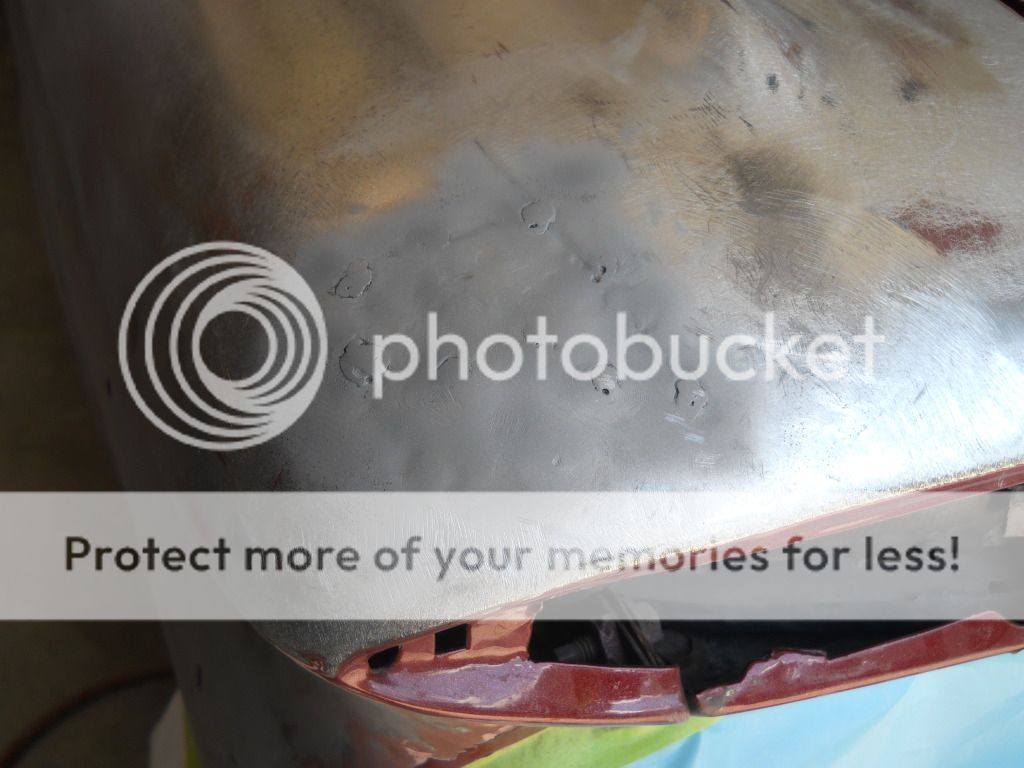
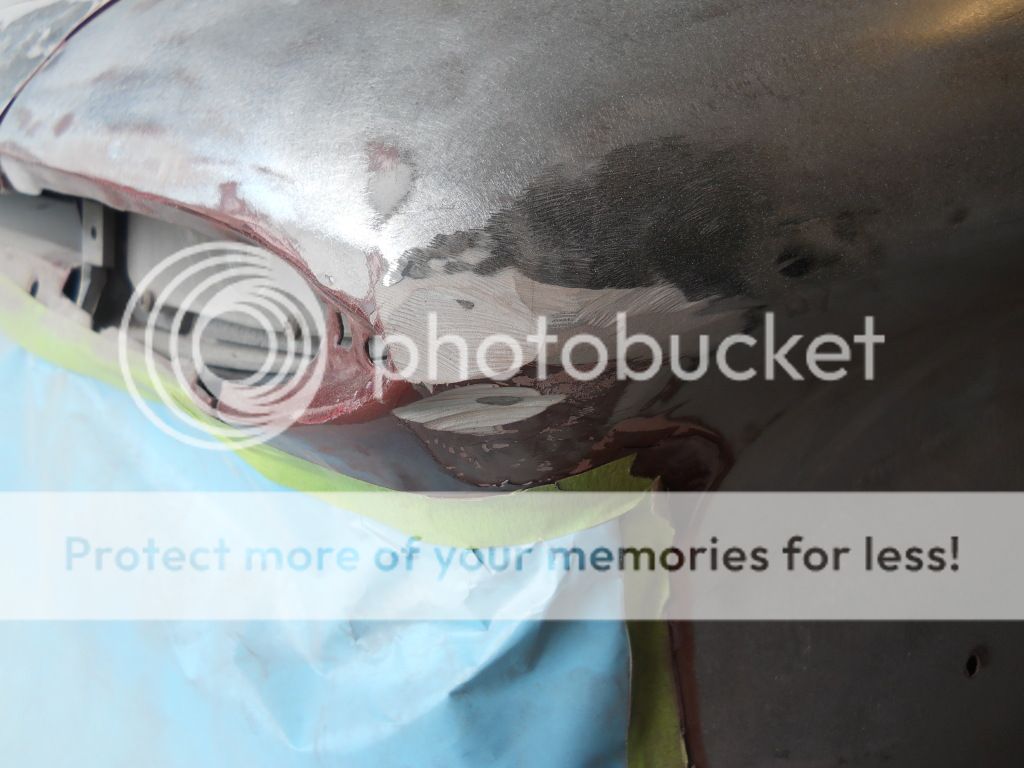
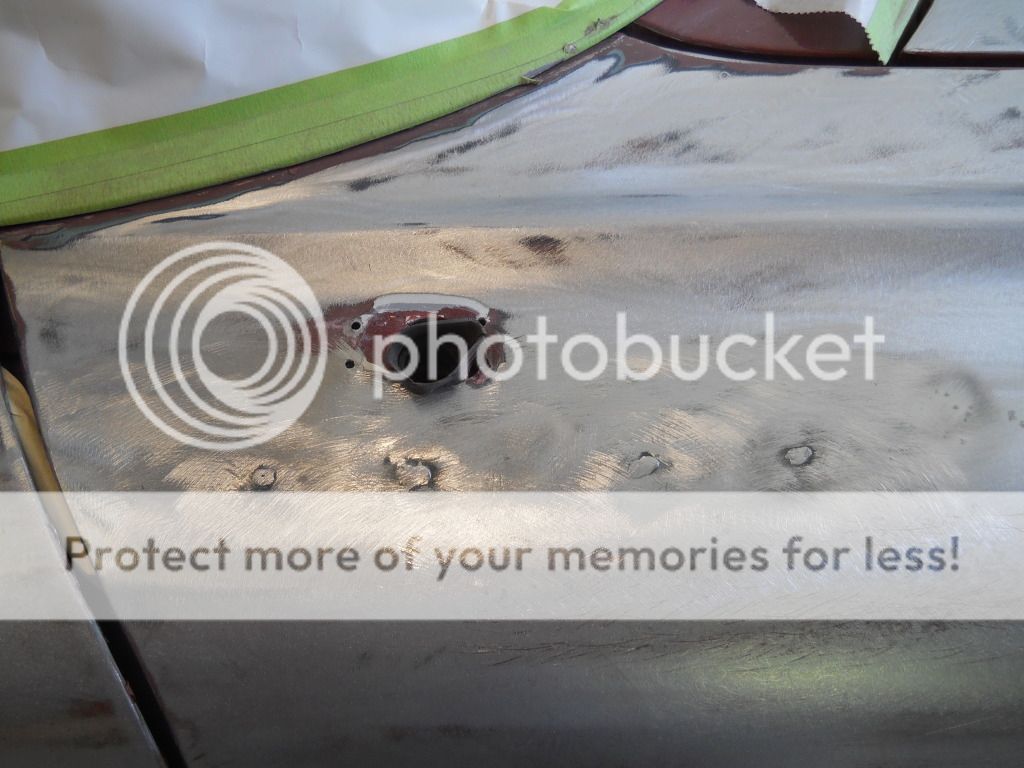
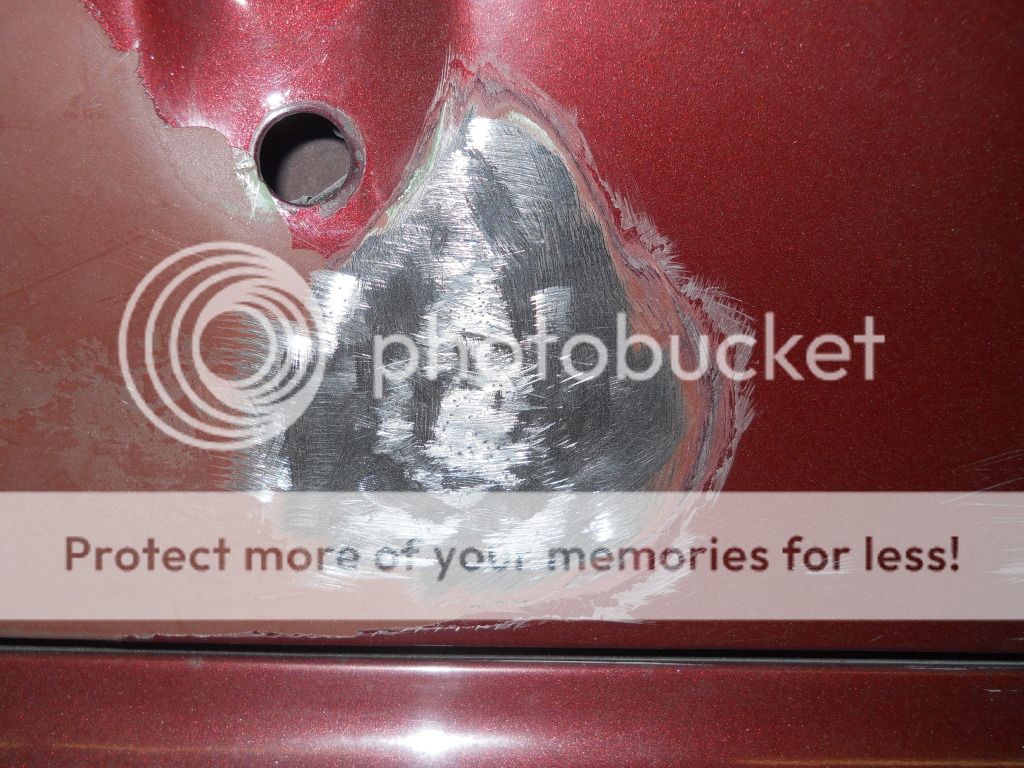
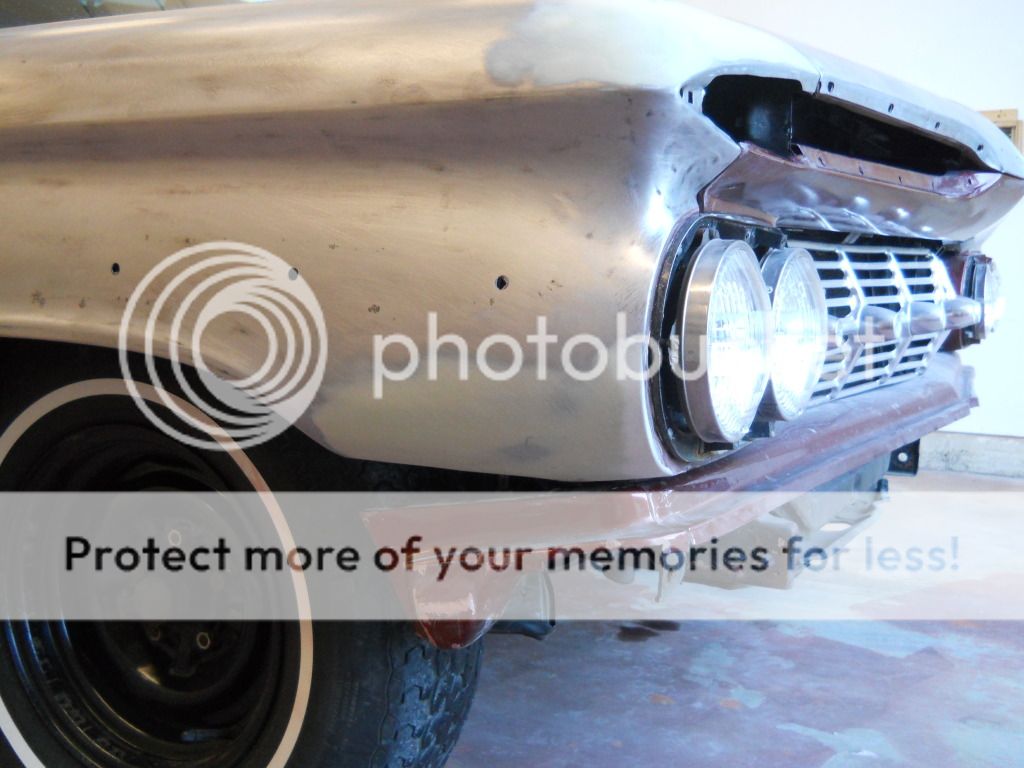
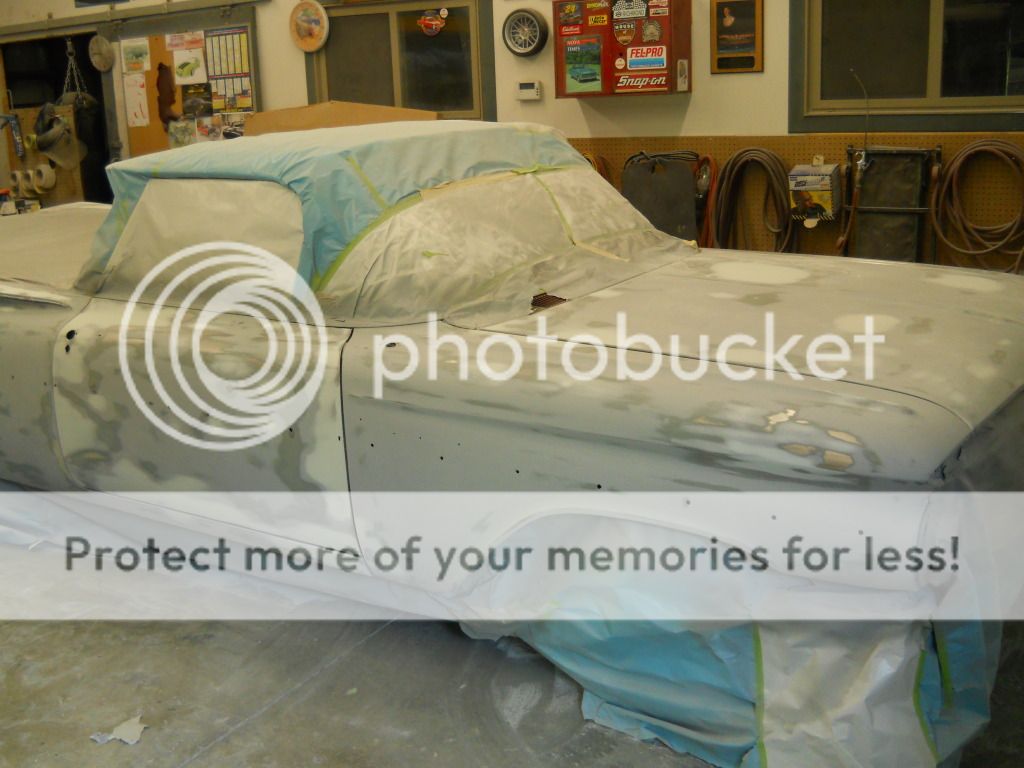
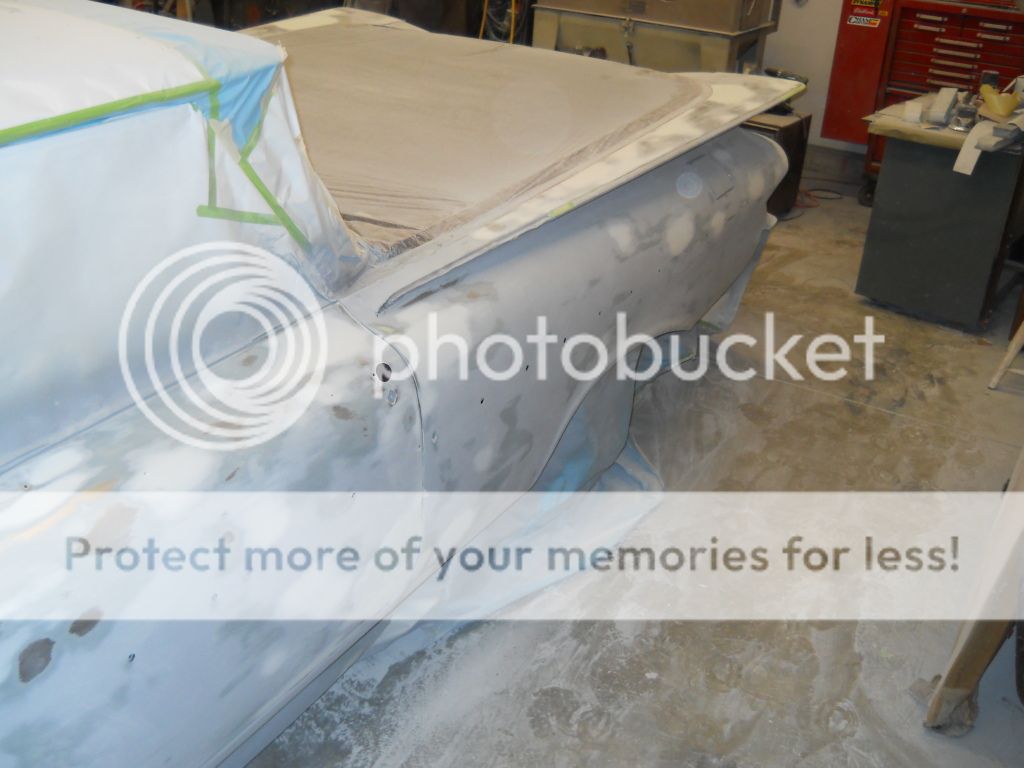
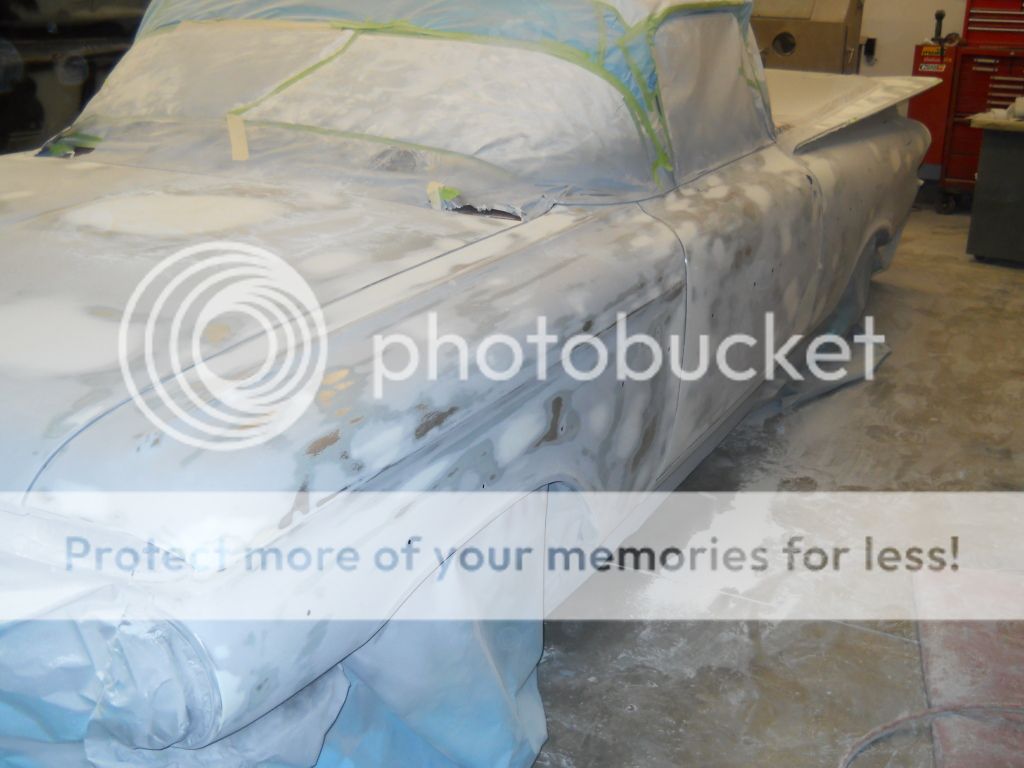
When I was your age, I never thought about using a floor pad to kneel or lay on. Now I need an orthopedic mattress to look under the car.evileyeconfusebiggrinbiggrinbiggrin


__________________

OldGuy Joe


77


BARRIE, ONTARIO

Status: Offline
Posts: 1397
Date:
Permalink Closed

I,ve always liked the 58- 60 El Camino,s . ..77.

__________________

I,m as cool as Milner , but axeually a bit more like Beckwith


ONTARIO

Status: Offline
Posts: 1454
Date:
Permalink Closed

beautiful........just beautiful. Didn't find it in Jericho On. did he?

__________________


BRANT COUNTY, ONT

Status: Offline
Posts: 1155
Date:
Permalink Closed

Here's some pics of what we found under the shinny stuff.  There was at least 2 colour coats, 2 clear layers plus primers/laquer putty and at one spot I counted 10 layers before bare steel. Just like the rings of a tree!!  This is why I decided to take the car down to bare steel and give it a good base to start with.

Bob also wanted some of the trim and other chrome removed.  The Camaro rocker chrome was #1 on the list as well as the trailer plug on the tailgate and he preferred not to have the two tone trim and top of fender trim.

That's it for now.

Rich


__________________

slab----67 chevy II 2dr post and 66 chevy II hardtop

plus the kids 87 Camaro and 68 SS Camaro


GUELPH, ONT

Status: Offline
Posts: 191
Date:
Permalink Closed

gotta love the good old laquer putty LOL.. I remeber my dad using that stuff in his body shop 30 years ago,,, My how times have chaged... thanks god for progression in quality... I would nver use that shrinking old garbage LOL

__________________


BRANT COUNTY, ONT

Status: Offline
Posts: 1155
Date:
Permalink Closed

This is some pics of the shrinking and pulling of the right side.

Bob wanted the two tone trim gone..so I welded up the holes. It sure is nice working on something made from real solid steel.

Found a weak point in the spot weld on the top of the patch panel...so I added some weld to seal it up.


-- Edited by slab on Saturday 21st of July 2012 10:21:17 PM

__________________

slab----67 chevy II 2dr post and 66 chevy II hardtop

plus the kids 87 Camaro and 68 SS Camaro


BRANT COUNTY, ONT

Status: Offline
Posts: 1155
Date:
Permalink Closed

Here's some more pics.  While the boys were razor blading off the paint...I striped out the filler and primers on the 1/4's/box sides.  Here's what I found. Both sides are the same more or less but I only have pics of the right side.

Not sure how easy it is to see the problems with the repairs but I'll do my best to point them out.  The biggest problem was the quaility of the patch panels was not great in the 70's and for 59's not that great even today.  Like I said earlier..NOS while available at a serious price is not in the game plan.  The upper welds were spot welds and were pretty well done but the ends of the panel were welded with a coat hanger I think and the warpage was huge.  There are several solutions but we picked the one that would not open any big cans of worms. My plan is to shrink and pull the panel to get rid of warpage and try to give the panels some shape which was lacking from the day they were first put on. I'll get the panels as close as possible then smooth them back out with filler and high build urethane primers. 

That will be  the next round of pics.

Rich


__________________

slab----67 chevy II 2dr post and 66 chevy II hardtop

plus the kids 87 Camaro and 68 SS Camaro


BRANT COUNTY, ONT

Status: Offline
Posts: 1155
Date:
Permalink Closed

OldGuy 71Acadian wrote:

As usual, great job Rich.biggrin I think Bob will be much happier with this route, rather than the original plan of just doing the bottom.evileye

How's Ben's project. He should start a build thread here too.biggrinbiggrinbiggrin


 Thanks Oldguy.  Yes Bob's very happy and is really liking the way things are shaping up.  He has two favorite things to say when he comes over..."Have you got it on the rotissorie yet?" and "remember..it was done in the 70"s...that's how they did it back then!" LOLsmilesmile 

As for Ben's car last week he threw all the parts he removed back into the car so we can move it out of the booth and back outside.  Bob's will be in the booth getting primed later this week. Ben has some pics of the Camaro but since we can't get into it too deep until the fall (I'm booked until Christmas basically) he doesn't want to start and stop with the pics.  He will have a thread though.  

Look who I found covered in dust!


-- Edited by slab on Sunday 22nd of July 2012 09:15:38 AM

__________________

slab----67 chevy II 2dr post and 66 chevy II hardtop

plus the kids 87 Camaro and 68 SS Camaro


ONTARIO

Status: Offline
Posts: 194
Date:
Permalink Closed

As usual, great job Rich.biggrin I think Bob will be much happier with this route, rather than the original plan of just doing the bottom.evileye

How's Ben's project. He should start a build thread here too.biggrinbiggrinbiggrin


__________________

OldGuy Joe


BRANTFORD, ONT

Status: Offline
Posts: 661
Date:
Permalink Closed

This is the "Slabs" thread so I will keep my comments to a minimum. i bought the car in Woodstock from a retired bodyman who did a "frame off" in the late 70's. It was his "baby" and he did a great job based on methods and materials 37 years ago. The frame is mint [painted gloss black]as is the floor pans [painted body colour].Based on how nice the car is underneath it deserves to have 'Slab" work his majic topside.

__________________
Bob T


PALOOKAVILLE

Status: Offline
Posts: 231
Date:
Permalink Closed

Looks great Bob!

__________________


ONTARIO

Status: Offline
Posts: 194
Date:
Permalink Closed

Bob T wrote:

This is the "Slabs" thread so I will keep my comments to a minimum. i bought the car in Woodstock from a retired bodyman who did a "frame off" in the late 70's. It was his "baby" and he did a great job based on methods and materials 37 years ago. The frame is mint [painted gloss black]as is the floor pans [painted body colour].Based on how nice the car is underneath it deserves to have 'Slab" work his majic topside.


 Well Bob, that makes you and I, that know what a hard working, talented and most importantly, honest person Rich is. You couldn't have made a better choice in my opinion. I've seen your car in person and any car person would fall in love with it. Rich will do you proud.biggrinbiggrinbiggrin


__________________

OldGuy Joe


ONTARIO

Status: Offline
Posts: 194
Date:
Permalink Closed


 Isn't grasshopper a little young to be using a chair already.confuseevileyebiggrin At this rate, he'll never snatch the pebble from your hand.biggrinbiggrinbiggrin


__________________

OldGuy Joe


BRANT COUNTY, ONT

Status: Offline
Posts: 1155
Date:
Permalink Closed

OldGuy 71Acadian wrote:


 Isn't grasshopper a little young to be using a chair already.confuseevileyebiggrin At this rate, he'll never snatch the pebble from your hand.biggrinbiggrinbiggrin


 Ben's doing great.  He put in 7.5 hrs on the car the day of the pic and that was all sanding/stripping paint.  Really helped get things moving while I was straightening out steel.  He'll be doing almost everything on his Camaro under my close eye.  I know he's pretty excited about it.


__________________

slab----67 chevy II 2dr post and 66 chevy II hardtop

plus the kids 87 Camaro and 68 SS Camaro


DORCHESTER, ONT

Status: Offline
Posts: 259
Date:
Permalink Closed

Great thread love that car and nice to see the stages of progress. For some of us non-body guys its a education on how to do a project and what materials are involved.
Thanks for the detailed pics ,keep them coming. Nice to see a young gun getting dirty.

__________________
gotta be young and dumb before you get old and wise


BRANT COUNTY, ONT

Status: Offline
Posts: 1155
Date:
Permalink Closed

Here's some pics of the bare steel showing how solid a project this car really is. 

There are no patches or rust in the doors , fenders or hood. biggrinbiggrin

Here's a couple shots of the filler work on the box sides. I first put short stand fibreglass over the welds to seal them up and some of the really low spots.  Where the welds were in the front of the patch panels, the metal was welded so thick that getting it flat would have required cutting and re-welding.  We decided against it because the repair was solid and I was able to reduce the amount of filler needed with the shrinking and pulling.

Some one at some point in time put back-up lights under the tail lights and then someone else removed them and welded up the holes. I smoothed that out as well.

Found some rust up here so I patched it and smoothed it out.

Thanks for the positive comments everyone.

More pics to follow.

Rich


__________________

slab----67 chevy II 2dr post and 66 chevy II hardtop

plus the kids 87 Camaro and 68 SS Camaro


WATERFORD, ONT

Status: Offline
Posts: 656
Date:
Permalink Closed

Wow...nice work. I was over to see Bob yesterday and he was raving about your work. Looks and sounds like the car is in very good hands.

Loving the pics and the details. Keep them coming.

__________________

Member of Brantford Piston Pushers and a Disciple of Speed of the E.L.T.A.

www.pistonpushers.ca


NIAGARA FALLS, ONT

Status: Offline
Posts: 545
Date:
Permalink Closed

Great job Slab! It's always amazing how quickly things can snowball, but I like your approach to this project...the right approach. Strip 'er all down and start from the beginning. Many less headaches that way and Bob will get results that'll last for a very long time.

Looking forward to your next installment!  biggrinbiggrinbiggrin


__________________

Nick M.

A journey in design and fabrication begins with a vision, a single pen stroke ... and in some cases the blow of a hammer.


LINDSAY, ONT

Status: Offline
Posts: 633
Date:
Permalink Closed

Sweet car...and nice work! Thanks for sharing the process for us to see!

__________________

Adam - '65 Ford F-250 Custom

LOSERS CAR CLUB


BRANT COUNTY, ONT

Status: Offline
Posts: 1155
Date:
Permalink Closed

Been on Holidays for a week so I'll try and get caught up with some more pics.  The car has had it's share of dents and dings over time and most of them were small and just filled(you can see the filler in some of the above shots already posted).  With the newer ways of pulling dents(stud gun) I was able to get the metal alot closer requiring a skim of filler and in some cases primer would fix it.  I like the old school metal finishing(did on my own wagon project) but It is a very long process, so I just get it as close as possible to minimize filler. 

You can see the dent pulling "old method" in a couple of the shots which was drill a hole to attach puller then weld up holes.  I pulled these out better before adding filler.  Looks like the car had outside mirrors on the fenders at one point in time. 

Here's a couple bad spots that will need to be fixed up alot better.

Not sure what's under this yet!!


-- Edited by slab on Monday 6th of August 2012 08:00:55 AM

__________________

slab----67 chevy II 2dr post and 66 chevy II hardtop

plus the kids 87 Camaro and 68 SS Camaro


BRANT COUNTY, ONT

Status: Offline
Posts: 1155
Date:
Permalink Closed

I missed the mirror on fender shot. So here it is.

The trailer plug in the tailgate was here, but I butt welded in a patch. See the layers of paint!! This didn't have as much as the boxsides.

Pretty well finished with the right side in this shot.

More to come later this week.

Rich


-- Edited by slab on Monday 6th of August 2012 07:58:54 AM

__________________

slab----67 chevy II 2dr post and 66 chevy II hardtop

plus the kids 87 Camaro and 68 SS Camaro


ONTARIO

Status: Offline
Posts: 4606
Date:
Permalink Closed

Looks good Rich !!
I've been doing bodywork for years, and I'll give you my top secret !!
Now that the body is fairly straight, shoot the whole thing with "sprayable polyester primer".
There's a few different brands out there, but "Slick Sand" is what I use.
Trust me on this one !!


http://www.evercoat.com/productdetail.aspx?pid=28


-- Edited by hemi43 on Monday 6th of August 2012 08:57:56 AM

__________________


GUELPH, ONT

Status: Offline
Posts: 191
Date:
Permalink Closed

I use slick sand too, I shoot it and let it sit for a week or so, then block the hell out of it

__________________


ONTARIO

Status: Offline
Posts: 4606
Date:
Permalink Closed

Chad wrote:

I use slick sand too, I shoot it and let it sit for a week or so, then block the hell out of it


 I let it sit too, but it won't shrink like urethane products. I block it with 120 grit open faced paper. I buy it on a roll 2 1/2 inches wide and self adhesive  one side. I use a sanding block that's about 14 inches long, and use 3m powdered high-lighter. This system will make a perfectly flat panel even for first time users.

What the Slick Sand does is put an even coat about .040 thick over the whole panel. This coat is uniform in texture and hardness and that's why you get amazing results. If the quarter panel in the previous post was sprayed as it is now, all those feathered edges would show through and may cause blemishes in the final finish a few weeks after the paint was applied.


__________________


BRANT COUNTY, ONT

Status: Offline
Posts: 1155
Date:
Permalink Closed

hemi43 wrote:

Looks good Rich !!
I've been doing bodywork for years, and I'll give you my top secret !!
Now that the body is fairly straight, shoot the whole thing with "sprayable polyester primer".
There's a few different brands out there, but "Slick Sand" is what I use.
Trust me on this one !!


http://www.evercoat.com/productdetail.aspx?pid=28


-- Edited by hemi43 on Monday 6th of August 2012 08:57:56 AM


 Thanks. I beleive what I have in my shop is called Feather fill.  I am glad to hear good things about the sprayable polyester primer because I've only used it on one job so far and was looking to hit the car with epoxy first then the spray polyester primer next.  Do you let it sit a week as well?


__________________

slab----67 chevy II 2dr post and 66 chevy II hardtop

plus the kids 87 Camaro and 68 SS Camaro


ONTARIO

Status: Offline
Posts: 4606
Date:
Permalink Closed

Feather fill is a great product also. No need to wait a week, because it won't shrink. As far as putting epoxy under the Polyester, that all depends on who you ask. The polyester sticks like $hit to a wool blanket when applied over steel, but being polyester it is not waterproof like epoxy. I applied the polyester directly over the bare metal on my car 6 years ago, and have no signs of problems. If I had to do it again, I probably would put epoxy first.
I didn't want to hijack your thread, so I started a new one with pictures of my results.
Dan

__________________


ONTARIO

Status: Offline
Posts: 189
Date:
Permalink Closed

Quote ... "Look who I found covered in dust!"


Not trying to sound like a _____ (fill in the word or words of your choice :) but I sure hope he was wearing a respirator while sanding and only removed it for the photo op.

__________________


BRANT COUNTY, ONT

Status: Offline
Posts: 1155
Date:
Permalink Closed

More pics. I left off with a pic of the front fender damage on both sides.  Well this is what they look like now.

Pulled the passenger side out with stud gun but thought I could get it closer with some picking and filing. The black is a guide coat.

This is what it looks like before filler to smooth out the last imperfections.

This is what was under the filler on the drivers fender.


__________________

slab----67 chevy II 2dr post and 66 chevy II hardtop

plus the kids 87 Camaro and 68 SS Camaro


BRANT COUNTY, ONT

Status: Offline
Posts: 1155
Date:
Permalink Closed

Here's the left fender after pulling out dent and some metal finishing. The damage was worked a bit before so some of the metal was weak and split. I welded it back together and it was ready for filler.

Some of the tools I like to use.

Everything is getting closer to being ready for epoxy.

More stuff too fix up...never seems to end on these cars.  Lots of surprises. No rust though.  


__________________

slab----67 chevy II 2dr post and 66 chevy II hardtop

plus the kids 87 Camaro and 68 SS Camaro


NORTH BAY, ONT

Status: Offline
Posts: 3717
Date:
Permalink Closed

Great photo shoot of your'e progress, thanks for posting this.

__________________


BRANT COUNTY, ONT

Status: Offline
Posts: 1155
Date:
Permalink Closed

More dents and creases on the hood. being pulled out.

I striped the rest of the paint off the finns and found bondo'd up holes one each side same basic local??? I welded them up.

Thanks for looking and the comments.

Rich


-- Edited by slab on Sunday 12th of August 2012 07:46:37 AM

__________________

slab----67 chevy II 2dr post and 66 chevy II hardtop

plus the kids 87 Camaro and 68 SS Camaro


BRANT COUNTY, ONT

Status: Offline
Posts: 1155
Date:
Permalink Closed

Here's a couple early shots I forgot to post up. Check out the layers of paint on the lower box side!! And also the only rust hole I had to fix.


__________________

slab----67 chevy II 2dr post and 66 chevy II hardtop

plus the kids 87 Camaro and 68 SS Camaro


LINDSAY, ONT

Status: Offline
Posts: 633
Date:
Permalink Closed

Great progress shots!

__________________

Adam - '65 Ford F-250 Custom

LOSERS CAR CLUB


BRANT COUNTY, ONT

Status: Offline
Posts: 1155
Date:
Permalink Closed

Masking is a pain on old cars with everything shiny on the bottom and nice engine bays. Paint gets everywhere. Some painters say they can put paint only where they want it and not need to mask that much....I ain't one of them!!LOL I am getting better at it...........

Masked motor with plastic first.

Then paper.

left the car off the stands for this part so the paper hit the floor.


-- Edited by slab on Sunday 19th of August 2012 08:43:24 AM

__________________

slab----67 chevy II 2dr post and 66 chevy II hardtop

plus the kids 87 Camaro and 68 SS Camaro


BRANT COUNTY, ONT

Status: Offline
Posts: 1155
Date:
Permalink Closed

Sorry for the start and stops...computer internet problems .  I hit post as soon as I think it is going to crash.LOL

Where was I??

Now for the epoxy. I was going to use feather fill as a first sanding primer, so I check the spray instructions and it is different than slick sand in the way that it is not to go over bare steel. Epoxy and etch primers are good as a substrate for feather fill though. Perfect.

Epoxy is done!! Now we wait at least 1hr then hit it with a couple coats of feather fill by Evercoat.

Too early to tell if it's straight..no shine...But I know it needs more blocking. Anyone got some tips on how "not" to run the clear when painting under those fins?????

Well that's everything up to Sat. Aug 18/2012. Let the sanding and blocking begin.

Rich


-- Edited by slab on Sunday 19th of August 2012 08:49:00 AM

__________________

slab----67 chevy II 2dr post and 66 chevy II hardtop

plus the kids 87 Camaro and 68 SS Camaro


ONTARIO

Status: Offline
Posts: 4606
Date:
Permalink Closed

I've only sprayed Dupont, but have not tried the water borne stuff yet !! I'm not sure if I would do a complete for my first time though !!
I guess I should have asked what colour you were going with. Dupont's Nason bases are a good paint, but the colour matches suck, and a lot of OEM colours are not available. I guess that's a direct reflection of the price also. If you're doing a complete it's not so critical, but I would be concerned down the road if you were ever going to do touch ups. Also, if you plan on using Nason base, some of the colours are very transparent. FYI, Chroma Premier base is still available in the US.
If I can give you a bit of advice, make sure you use a sealer before applying your base, no matter what type you plan to use. This will help the base to crosslink into it.
As far as clear, spend the bucks!! I love Dupon't Chroma Premier 72500. If you plan on cutting and buffing then apply 3 coats. I'm sure you know what you're doing, but I'm just telling you what has worked for me. I painted my car 6 years ago and it still looks perfect today with no fading.


-- Edited by hemi43 on Sunday 19th of August 2012 12:15:17 PM

__________________


BRANT COUNTY, ONT

Status: Offline
Posts: 1155
Date:
Permalink Closed

I have Basically only used Dupont. I've messed around with some PPG and BASF but always came back to Dupont. I use one of two clears....Nason clear, or Chroma Clear, depending on the type/price of the job. Nason base in the colour of the Elky is not good at all. Very transparent(already did a spray out card with it). I did get a good match with there single stage paint (put clear over it) but again by the time I got coverage it was extremely orange peely. I have sprayed waterbase on a small job(Rear end hit) in yellow and it covered like a wet blanket. Solid colour always does but you could tell there was something different. Waterbase smells funny though!!LOL What type of sealer were you using? Dupont has gotten rid of a bunch of products due to the new regulations. The trouble with buying in the USA is that (other than it being illegal to bring back here from what I understand) you better make sure you buy extra for the Murphies law will say that you will run out or something. I haven't done to many small jobs since the "change Over" to test out waterbase because I was stuck in a body off resto and the customer went with OMNI (PPG) with sherwin williams clear. My gut says waterbase is the way to go. Not the cheapest way to go but probably the best way. Shops around here love it and wish they had changed way sooner instead of waiting for the deadline forcing them to change. I'll be taking to the rep in the next couple weeks.

Here is the re-bodied project when it left in the spring. Owner is putting it back together.


-- Edited by slab on Sunday 19th of August 2012 02:07:40 PM


-- Edited by slab on Sunday 19th of August 2012 02:13:48 PM


-- Edited by slab on Sunday 19th of August 2012 02:14:54 PM

__________________

slab----67 chevy II 2dr post and 66 chevy II hardtop

plus the kids 87 Camaro and 68 SS Camaro


BRANT COUNTY, ONT

Status: Offline
Posts: 1155
Date:
Permalink Closed

Here's some pics to wrap up the body work side of things.

Tailgat stripped.

Found some more patches here.

Some progress on hood and fender.


__________________

slab----67 chevy II 2dr post and 66 chevy II hardtop

plus the kids 87 Camaro and 68 SS Camaro


BRANT COUNTY, ONT

Status: Offline
Posts: 1155
Date:
Permalink Closed

Well here we go on phase two. Let's get this thing into epoxy and primer.

Moved car out and blew it off and wiped it down. Very dusty!

Fender corner with a lot less filler than before.

That other last find all fixed up.


__________________

slab----67 chevy II 2dr post and 66 chevy II hardtop

plus the kids 87 Camaro and 68 SS Camaro


ONTARIO

Status: Offline
Posts: 4606
Date:
Permalink Closed

Looks good !! What type of paint are you going to use?

__________________


BRANT COUNTY, ONT

Status: Offline
Posts: 1155
Date:
Permalink Closed

Bob was over at the shop yesterday and asked me the same question.  I would like to use Duponts Chromax Pro waterbase if we can get the colour that we need to match the roof and jambs.  If that doesn't work out then I guess Nasons base clear. The trouble now days is that the paints are all transparent like crazy and hard to get coverage. The waterbase though...covers real nice in two coats.  To make this a shorter anwser....I will be chatting with the Dupont rep real soon. 

Thanks

Rich


__________________

slab----67 chevy II 2dr post and 66 chevy II hardtop

plus the kids 87 Camaro and 68 SS Camaro


BRANT COUNTY, ONT

Status: Offline
Posts: 1155
Date:
Permalink Closed

I thought that the 64 GTO 1/4 panels I worked on were going to be the hardest, panels to get straight......these have got to be 2nd place. They are long and have so many curves and fading out lines and radious's.  But There getting there.

Thought this was a nice back drop for your car Bob...

Moved the car and threw on some guide coat.

Got started on the right side.


__________________

slab----67 chevy II 2dr post and 66 chevy II hardtop

plus the kids 87 Camaro and 68 SS Camaro


WATERFORD, ONT

Status: Offline
Posts: 656
Date:
Permalink Closed

This is a great education. Nice work. Bob's gonna be happy I'm sure. Keep it coming...!

__________________

Member of Brantford Piston Pushers and a Disciple of Speed of the E.L.T.A.

www.pistonpushers.ca


LINDSAY, ONT

Status: Offline
Posts: 633
Date:
Permalink Closed

Wow great work! And yes very educational lol

__________________

Adam - '65 Ford F-250 Custom

LOSERS CAR CLUB


MILTON, ONT

Status: Offline
Posts: 960
Date:
Permalink Closed

Nice work Rich and Ben. Great post as well.

__________________

I DO WHAT THE LITTLE VOICES TELL ME TO DO.


NIAGARA FALLS, ONT

Status: Offline
Posts: 91
Date:
Permalink Closed

as for not running the clear thats hard to pin point depends on the gun type and the user same gun does not spray the same with two different people id probably lower the air pressure and do two dry coats back to back as opposed to one heavy type deal to make it lay smooth..... as for clear i have been using alot of unilack and i LOVE IT, far more than the chroma clear as i find it tends to look great when sprayed but looks pinched a few days later and does not polish near as nice as the unilack.....
beware of the waterborne paints the shop i was at last was the first to switch full water based in ontario i have been spraying it for 10 years or so, they claim it covers in two coats and it may look like it however check the coverage with a light reds are really bad i have had to use upto 10 coats on some reds even using a ground coat to get enough coverage i have sprayed ppg pro spray dupont and shermin will they all suck for coverage equally regardless of what the reps say....i have put alot of paint through guns and find the waterborne is GREAT i wouldnt go back but it dont cover like they say, i see alot of cars that are highly transparent at shows so just a heads up

__________________


BRANT COUNTY, ONT

Status: Offline
Posts: 1155
Date:
Permalink Closed

Sorry for the long delay in pictures fellas...Had to wait for the dust to settle. Lots of blocking and fixing of small lows and flats on the rolls of the radius' of the body. Since most of the car went from bare metal to epoxy then to prime there where quite a few imperfections to fix. I must admit...I thought the feather fill would handle more than it did. But no problems in my book, just added some polyester putty (finer finisher filler) to the lows and it's ready for more primer. Keep in mind that as with almost everything...there are lots of ways to do things in this game. Not everyone does this the same but the results can still come out the same. I do way more hand sanding and blocking then my buddy who was a painter/prep guy for years. He was real good with a DA sander etc. But as long as the results are what we need, that's what counts. On this car I really wanted to have epoxy on the steal, then finish with polyester putty. Others may have coated the hole door with filler(I've seen some of the car TV shows do this) then block it then prime. There are also some customer limits that we have to work around. Bob reminded me last week of our goal here. "Good enough not to be an embarrassment, not a put on a pedistal show winner" Any ways with all that mumble jumble out of the way.....I still don't have pics until later today!LOL

__________________

slab----67 chevy II 2dr post and 66 chevy II hardtop

plus the kids 87 Camaro and 68 SS Camaro


BRANT COUNTY, ONT

Status: Offline
Posts: 1155
Date:
Permalink Closed

Well  here's some more pics. I basically ripped the primer down with 120grit paper on Dura blocks.  I put polyester putty in to fix lows and imperfection and by the time I was done...Not much primer left on some of the parts. I expected this (not quite this much on the doors but) I will be repriming with feather fill again but will first put epoxy on the bare metal spots.  Then start blocking agian with 220grit on the long board.  


__________________

slab----67 chevy II 2dr post and 66 chevy II hardtop

plus the kids 87 Camaro and 68 SS Camaro


OTTAWA, ONT

Status: Offline
Posts: 64
Date:
Permalink Closed

That is going to be one lazer straight Camino when its done!  Thanks for sharing the pictures!


__________________

Brian

(Ottawa area rep for the Right Coast Association)

1955 Chevrolet Belair two door post

2009 Dodge Challenger R/T

1 2  >  Last»  | Page of 2  sorted by
 
Quick Reply

Please log in to post quick replies.


Create your own FREE Forum
Report Abuse
Powered by ActiveBoard