Members Login
Username 
 
Password 
    Remember Me  
Post Info TOPIC: 1941 NEW YORKER


MARKHAM, ONT

Status: Offline
Posts: 1342
Date:
RE: 1941 NEW YORKER
Permalink  


sasquatch wrote:

Just bein nosey checking out the background in the pics of your'e shop, wondering,, is that a Logan or Rockwell metal lathe, and i noticed you also have a mill/drill there also. Lol

Shop stuff always attracts interest!!


Its a West Bend 9" lathe.

The mill was busy bee and has been sold. There is now a nice Bridgeport in one corner of the garage.


__________________
PUGSY


MARKHAM, ONT

Status: Offline
Posts: 1342
Date:
Permalink  
 

fatstax wrote:

when i was planning my rat truck frame, i considered using eighth wall tubing but instead i used three sixteen wall, i was concerned my truck wouldnt be heavy enough and might be wonky to drive.  have you thought of this?  you appear to be using eighth wall.  you rod might be pretty light but it looks like it will be like a sports car with higher tech suspension than my build so there may be no need to add weight.


 Hey stax.

My car will have no lightness problems. The New Yorker has a 128" wheel base, its huge. It should be 4000 lbs by the time I'm done.

BTW, wonky to drive = my ultimate goal.

I'm hoping for 600 FT/LBS and 500 HP.


__________________
PUGSY


MARKHAM, ONT

Status: Offline
Posts: 1342
Date:
Permalink  
 

I started on the rear lower control arms.

The cast aluminum would have been OK except they had no set up for coil overs.

I started with some sched 80 s/s pipe for the pivot tubes. The bushings are aftermarket Delrin.

I had to weld in some 14 ga s/s sleeves to get them sized just right.


IMG_1241 (Medium).jpg


IMG_1244 (Medium).jpg


IMG_1246 (Medium).jpg


I had a couple of pieces of 1-1/2" round 1/8 wall tube bent to shape. I made a jig using the stock control arm to get things dead on.

IMG_1249 (Medium).jpg


IMG_1251 (Medium).jpg


IMG_1252 (Medium).jpg


IMG_1254 (Medium).jpg


IMG_1256 (Medium).jpg


IMG_1261 (Medium).jpg


-- Edited by 123pugsy on Friday 14th of September 2012 05:30:14 PM

Attachments
__________________
PUGSY


MARKHAM, ONT

Status: Offline
Posts: 1342
Date:
Permalink  
 

I added two cross braces to really stiffen things up.


IMG_1287 (Medium).jpg


IMG_1296 (Medium).jpg


IMG_1300 (Medium).jpg


IMG_1302 (Medium).jpg


IMG_1304 (Medium).jpg


IMG_1305 (Medium).jpg


IMG_1306 (Medium).jpg


IMG_1312 (Medium).jpg


Attachments
__________________
PUGSY


MARKHAM, ONT

Status: Offline
Posts: 1342
Date:
Permalink  
 

Had to get coilover mounts and sway bar link hook up points done next.


IMG_1315 (Medium).jpg


IMG_1319 (Medium).jpg


IMG_1320 (Medium).jpg


IMG_1321 (Medium).jpg


IMG_1323 (Medium).jpg


IMG_1325 (Medium).jpg


IMG_1385 (Medium).jpg


Attachments
__________________
PUGSY


ONTARIO

Status: Offline
Posts: 1450
Date:
Permalink  
 

Danm, cna't type rihgt, I'm slobbreing all ovre the kyeboard.

__________________


MARKHAM, ONT

Status: Offline
Posts: 1342
Date:
Permalink  
 

Iwannagofast wrote:

Danm, cna't type rihgt, I'm slobbreing all ovre the kyeboard.


 LOL ......!!!!!

Thanks.


__________________
PUGSY


NORTH BAY, ONT

Status: Offline
Posts: 3717
Date:
Permalink  
 

Beautiful workmanship,, and excellent photos!!

P.S. Your'e metal lathe MUST be a "South Bend" not a "West Bend" Lol

(They made coffee pots.)

__________________


NIAGARA FALLS, ONT

Status: Offline
Posts: 545
Date:
Permalink  
 

Dang Pugsy, you don't mess around!! Words simply can't describe how great your chassis is coming out.   


__________________

Nick M.

A journey in design and fabrication begins with a vision, a single pen stroke ... and in some cases the blow of a hammer.


MARKHAM, ONT

Status: Offline
Posts: 1342
Date:
Permalink  
 

Thanks Guys.

BTW, my milling machine is actually a Cuisinart, but I said Bridgeport to try to keep it sounding cool.

__________________
PUGSY


MARKHAM, ONT

Status: Offline
Posts: 1342
Date:
Permalink  
 

The next order of business was the front kick ups.


IMG_1548 (Medium).jpg   


IMG_1557 (Medium).jpg


IMG_1564 (Medium).jpg


IMG_1565 (Medium).jpg


IMG_1566 (Medium).jpg


IMG_1568 (Medium).jpg


IMG_1569 (Medium).jpg


IMG_1570 (Medium).jpg


Attachments
__________________
PUGSY


MARKHAM, ONT

Status: Offline
Posts: 1342
Date:
Permalink  
 

More of the same....


IMG_1573 (Medium).jpg


IMG_1575 (Medium).jpg


IMG_1576 (Medium).jpg


IMG_1578 (Medium).jpg


IMG_1579 (Medium).jpg


IMG_1583 (Medium).jpg


IMG_1584 (Medium).jpg


IMG_1587 (Medium).jpg


Attachments
__________________
PUGSY


MARKHAM, ONT

Status: Offline
Posts: 1342
Date:
Permalink  
 

Crossmember was next....


IMG_1538 (Medium).jpg


IMG_1541 (Medium).jpg


IMG_1542 (Medium).jpg


IMG_1544 (Medium).jpg


IMG_1549 (Medium).jpg


IMG_1552 (Medium).jpg


IMG_1612 (Medium).jpg


Attachments
__________________
PUGSY


MARKHAM, ONT

Status: Offline
Posts: 1342
Date:
Permalink  
 

More crossmember......


IMG_1621 (Medium).jpg


IMG_1605 (Medium).jpg


IMG_1623 (Medium).jpg


IMG_1625 (Medium).jpg


IMG_1626 (Medium).jpg


IMG_1630 (Medium).jpg


Attachments
__________________
PUGSY


MARKHAM, ONT

Status: Offline
Posts: 1342
Date:
Permalink  
 

Crossmember continued...


IMG_1987 (Medium).jpg


IMG_1989 (Medium).jpg


IMG_1992 (Medium).jpg


IMG_1993 (Medium).jpg


IMG_1995 (Medium).jpg


IMG_1996 (Medium).jpg


IMG_1998 (Medium).jpg


IMG_1999 (Medium).jpg


Attachments
__________________
PUGSY


LINDSAY, ONT

Status: Offline
Posts: 633
Date:
Permalink  
 

Now that my friends is a beautiful thing!!

__________________

Adam - '65 Ford F-250 Custom

LOSERS CAR CLUB


MARKHAM, ONT

Status: Offline
Posts: 1342
Date:
Permalink  
 

Thanks Adam.

The next order of business was to make the upper control arms.

First thing was to get a computer program for checking the front end geometry.

ANALYZER.jpg


ANALYZER ROLL.jpg

Found these screw in ball joint sleeves at Horton's. I couldn't weld the steel to my stainless arms, so I got some more sched 80to wrap them in.

Bored them out and chamfered.

IMG_1225 (Medium).jpg

Sqeezed them into place....

IMG_1226 (Medium).jpg


IMG_1229 (Medium).jpg

Welded them up with s/s rod.

IMG_1418 (Medium).jpg


A couple of pieces of s/s pipe for the pivot sleeves and made up a jig. I had some 1" diameter, 1/8 wall tube bent up for these.

IMG_1769 (Medium).jpg


The sleeves warped like crazy from the welding. I joined two files together to hog out as much of the warped material as possible.

IMG_1801 (Medium).jpg


IMG_1806 (Medium).jpg


Attachments
__________________
PUGSY


MARKHAM, ONT

Status: Offline
Posts: 1342
Date:
Permalink  
 

Lower control arm ball joint sleeves. I'm using stock Cobra press in ball joints.


IMG_1417 (Medium).jpg


This pic shows the nice fit after pressing in a ball joint and taking it out.


IMG_1425 (Medium).jpg


IMG_1423 (Medium).jpg


Here's something funny. I started my lower arms and thought I had really nailed a great design.

Of coarse if the car only went straight they'd be wonderful.


IMG_1648 (Medium).jpg


IMG_1665 (Medium).jpg


IMG_1666 (Medium).jpg


IMG_1774 (Medium).jpg


How's that for clearance?


IMG_1781 (Medium).jpg


IMG_1784 (Medium).jpg


-- Edited by 123pugsy on Sunday 14th of October 2012 07:26:23 AM

Attachments
__________________
PUGSY


MARKHAM, ONT

Status: Offline
Posts: 1342
Date:
Permalink  
 

Upper control arms welded and polished after hand reaming for hours to true up the sleeves for the bushings.  I gave up trying to get them all the same. I now have a log of all the different sized bushings in case they need replaced.


IMG_1791 (Medium).jpg


IMG_1793 (Medium).jpg


IMG_1974 (Medium).jpg


IMG_1977 (Medium).jpg


The upper arm mount plates are 1/2'' s/s with slots to adjust caster. Camber is adjusted by adding equal amount of shims behind the plate front and rear.


IMG_1972 (Medium).jpg


Attachments
__________________
PUGSY


MARKHAM, ONT

Status: Offline
Posts: 1342
Date:
Permalink  
 

Coilover mounts.


IMG_2081 (Medium).jpg


IMG_2082 (Medium).jpg


IMG_2102 (Medium).jpg


IMG_2105 (Medium).jpg


IMG_2108 (Medium).jpg


IMG_2112 (Medium).jpg


IMG_2114 (Medium).jpg


IMG_2116 (Medium).jpg


IMG_2115 (Medium).jpg


IMG_2117 (Medium).jpg


Attachments
__________________
PUGSY


FINCH, ONT

Status: Offline
Posts: 1261
Date:
Permalink  
 

nothing to say but damn thats turning into one killer frame.Almost a shame to put a car on top of it.

__________________

 ///// Join THE LOSERS c.c. of Ontario Ask me how/////

LOSERS CAR CLUB


BRAMPTON, ONT

Status: Offline
Posts: 274
Date:
Permalink  
 

You have me drooling with all your beautiful fab work.

__________________


MARKHAM, ONT

Status: Offline
Posts: 1342
Date:
Permalink  
 

Of coarse matching motor mounts were in order...........


IMG_2244 (Medium).jpg


IMG_2250 (Medium).jpg


IMG_2339 (Medium).jpg


IMG_2340 (Medium).jpg


Of coarse by this time in, I was due for another screw up.  I needed three U joints to get the steering shaft around the mounts so it was time for some new ones.


IMG_3629 (Medium).jpg


IMG_3645 (Medium).jpg


IMG_3648 (Medium).jpg


IMG_3655 (Medium).jpg


IMG_3656 (Medium).jpg


IMG_3908 (Medium).jpg


-- Edited by 123pugsy on Sunday 14th of October 2012 05:27:44 PM

Attachments
__________________
PUGSY


MARKHAM, ONT

Status: Offline
Posts: 1342
Date:
Permalink  
 

Transmission crossmember.............


IMG_2295 (Medium).jpg


IMG_2297 (Medium).jpg


IMG_2300 (Medium).jpg


IMG_2319 (Medium).jpg


IMG_2330 (Medium).jpg


IMG_2333 (Medium).jpg


Gotta love stainless. It warps like crazy. If you scroll back 2 pics you'll see how warped the crossmember is. Clamped and heated and squeezed with the clamps until it straightened out.


IMG_2348 (Medium).jpg


IMG_2349 (Medium).jpg


Mount bracket for the....................


IMG_2352 (Medium).jpg


Gearvendors overdrive behind the 4L80E overdrive tranny. 

This allows me to weld the crossmember in as I can drop the tranny by first removing the Gearvendors unit.


IMG_2354 (Medium).jpg


-- Edited by 123pugsy on Sunday 14th of October 2012 05:40:26 PM

Attachments
__________________
PUGSY


NORTH BAY, ONT

Status: Offline
Posts: 3717
Date:
Permalink  
 

Agreed, can't say much more than damned nice work!!

__________________


MARKHAM, ONT

Status: Offline
Posts: 1342
Date:
Permalink  


Thanks Guys.


Drilled holes for the upper arm plates and inserted anti crush sleeves into the tube.


IMG_2135 (Medium).jpg


I got the idea for these adjusting washers from my IRS upper control arm bolts. The bolt has a built in washer on an eccentric. I didn't want to weld to a bolt and weaken it so I figured just a washer would do. I cut the haeds off some allan bolts and tacked them in so the alignment guy can tweak on them a little by little and move the upper arm forward or back.


IMG_2136 (Medium).jpg


IMG_2139 (Medium).jpg


IMG_2142 (Medium).jpg


Attachments
__________________
PUGSY


MARKHAM, ONT

Status: Offline
Posts: 1342
Date:
Permalink  
 

ROLLING (but not complete) CHASSIS....................


IMG_2146 (Medium).jpg


IMG_2148 (Medium).jpg


IMG_2149 (Medium).jpg


IMG_2150 (Medium).jpg


IMG_2153 (Medium).jpg


IMG_2154 (Medium).jpg


IMG_2160 (Medium).jpg


IMG_2161 (Medium).jpg


IMG_2164 (Medium).jpg


IMG_2166 (Medium).jpg


Attachments
__________________
PUGSY


MARKHAM, ONT

Status: Offline
Posts: 1342
Date:
Permalink  
 

More of the same..........


IMG_2167 (Medium).jpg


IMG_2171 (Medium).jpg


IMG_2173 (Medium).jpg


IMG_2174 (Medium).jpg


IMG_2175 (Medium).jpg


IMG_2181 (Medium).jpg


Attachments
__________________
PUGSY


MARKHAM, ONT

Status: Offline
Posts: 1342
Date:
Permalink  
 

Front body mounts...........


IMG_3109 (Medium).jpg


IMG_3110 (Medium).jpg


IMG_3115 (Medium).jpg


IMG_3130 (Medium).jpg


IMG_3137 (Medium).jpg


IMG_3159 (Medium).jpg


Attachments
__________________
PUGSY


MARKHAM, ONT

Status: Offline
Posts: 1342
Date:
Permalink  
 

Radiator.............


Made some aluminum ears for two pieces of 1/4'' side plates that will get welded to the sides of the rad to spread the load of the mounting. Don't want to be far from home when the side of the rad splits from the piece I welded on.


IMG_3241 (Medium).jpg


IMG_3246 (Medium).jpg


IMG_3247 (Medium).jpg


IMG_3251 (Medium).jpg


IMG_3260 (Medium).jpg


IMG_3269 (Medium).jpg


Attachments
__________________
PUGSY


MARKHAM, ONT

Status: Offline
Posts: 1342
Date:
Permalink  


Back to the body.

Next order of business was to stiffen up the engine compartment opening.

Started with some brake formed angles. A bit of stretching and shrinking and the parts were ready to weld.

The last pic shows how I'd like to finish the rim off.


IMG_4157 (Medium).jpg


IMG_4165 (Medium).jpg


IMG_4168 (Medium).jpg


IMG_4174 (Medium).jpg


img_4181.JPG


IMG_4186 (Medium).jpg


IMG_4186A (Medium).JPG


Attachments
__________________
PUGSY


MARKHAM, ONT

Status: Offline
Posts: 1342
Date:
Permalink  
 

I made up a jig to tack in the headlight plates and to try to get everything straight and true this time.


IMG_4186B(Medium).JPG


IMG_4238 (Medium).jpg


IMG_4241 (Medium).jpg


IMG_4241A (Medium).JPG


IMG_4257 (Medium).jpg


IMG_4260 (Medium).jpg


Attachments
__________________
PUGSY


MARKHAM, ONT

Status: Offline
Posts: 1342
Date:
Permalink  


Got the headlight plates welded and one side cleaned up yesterday.

I  installed one headlight to see how she'd look......


IMG_4306 (Medium).jpg


IMG_4309 (Medium).jpg


IMG_4314a (Medium).jpg


IMG_4322 (Medium).jpg


Attachments
__________________
PUGSY


MARKHAM, ONT

Status: Offline
Posts: 1342
Date:
Permalink  


I liked what I saw so much that I went ahead and cut the second hole out.

(I also need the hole to help planish the weld.)


IMG_4324 (Medium).jpg


IMG_4325 (Medium).jpg


IMG_4326 (Medium).jpg


That's got the project thread right up to date up until about an hour and a half ago.


Thanks for gawkin at me build,


Attachments
__________________
PUGSY


NORTH BAY, ONT

Status: Offline
Posts: 3717
Date:
Permalink  
 

Beautiful piece of workmanship!!!

Thanks for posting all the great pics of this build, interesting and enjoyable !

__________________


BRAMPTON, ONT

Status: Offline
Posts: 274
Date:
Permalink  
 

I love how you fab everything yourself. Everything looks amazing!

__________________


ONTARIO

Status: Offline
Posts: 4606
Date:
Permalink  
 

You never did mention what engine you were running ! Please, please, please don't tell me it's Chev or Ford powered?? All that work, this car must be Chrysler powered !! It would make it faster too !


Edit; Never mind ! I read an earlier post you made and noticed you were using a 4l80E. I'm crushed !! LOL

I really wanted to see something like a 6.1 Hemi in it 
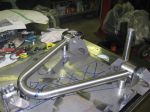
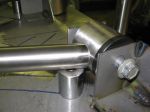
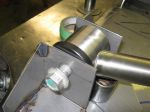
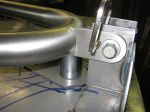
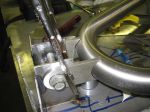
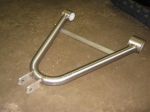
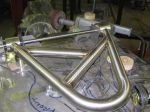
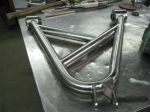
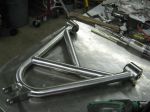
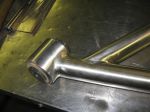
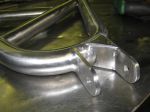
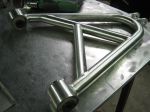
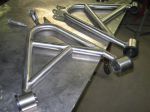
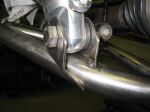
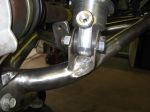
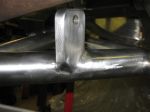
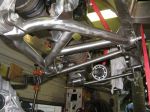
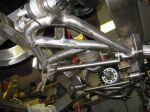
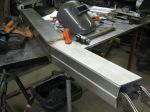
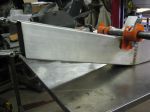
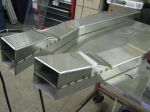
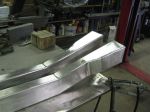
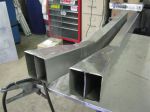
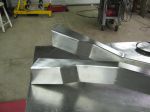
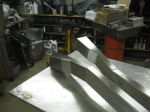
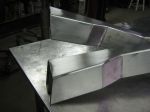
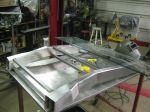
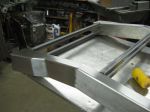
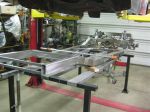
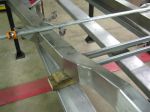
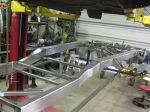
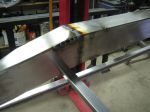
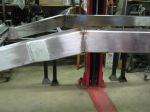
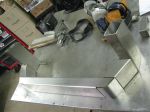
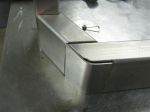
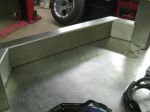
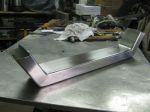
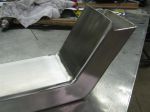
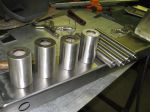
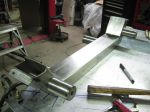
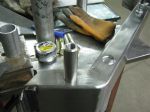
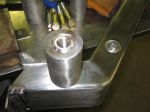
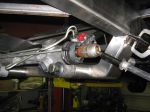
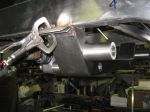
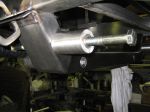
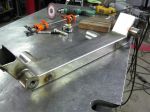
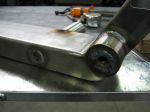
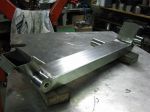
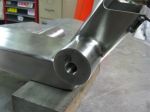
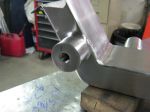
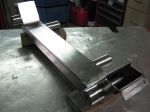
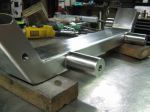
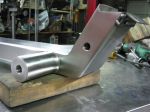
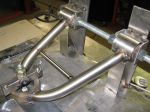
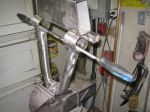
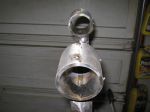
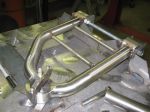
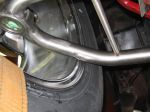
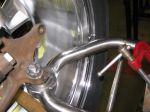
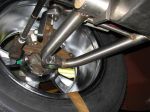
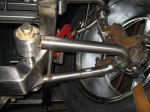
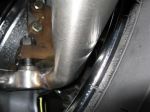
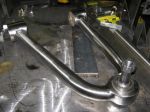
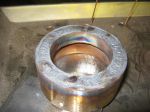
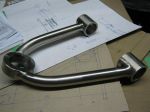
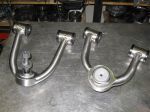
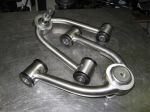
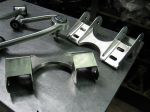
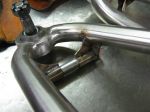
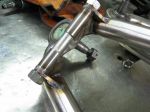
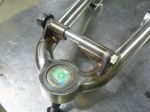
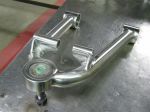
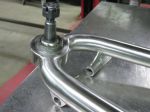
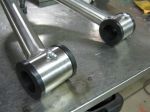
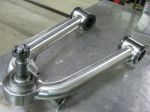
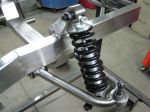
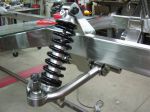
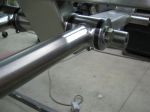
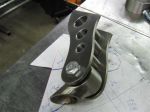
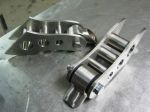
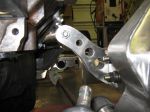
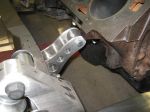
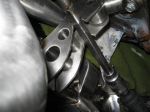
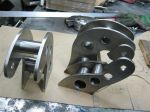
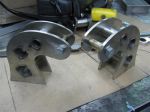
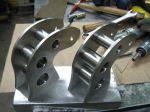
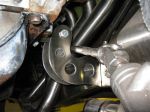
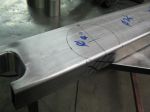
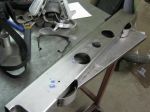
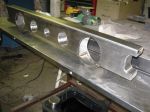
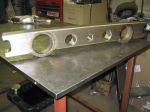
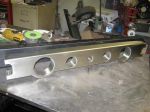
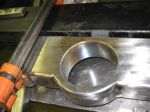
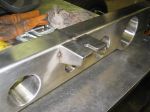
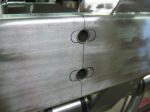
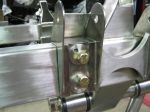
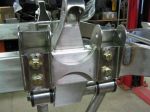
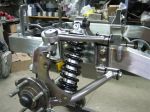
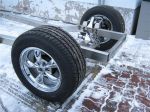
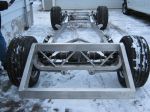
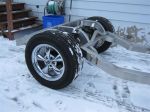
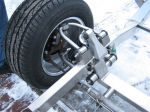
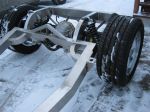
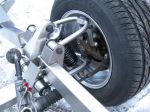
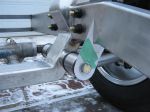
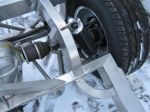
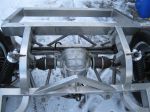
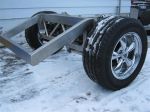
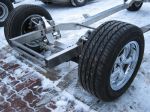
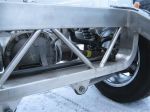
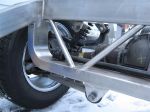
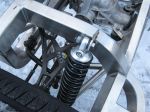
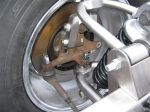
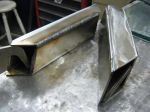
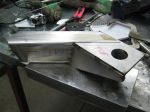
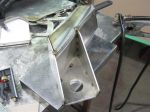
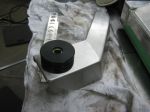
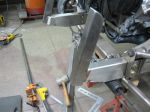
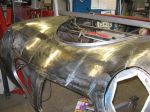
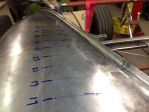
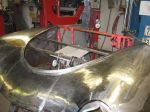
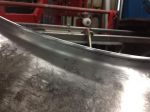
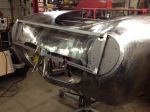
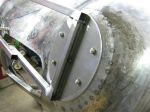
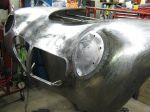
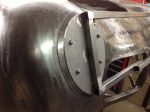
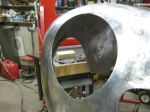
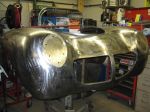
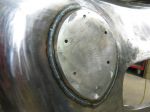
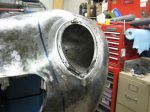
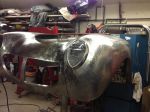
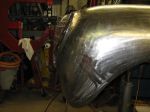
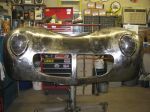
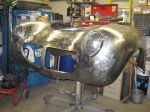
The price of stainless will go through the roof because you've used it all in that frame. I keep away from stainless because that's one material I hate working with. Will interesting to see how it handles the stresses of the frame. Nice work !!


-- Edited by hemi43 on Tuesday 27th of November 2012 10:00:00 AM

__________________


BRANTFORD, ONT

Status: Offline
Posts: 2269
Date:
Permalink  
 

AMAZING ! ABSOFORKINGLUTLY AMAZING!


-- Edited by Grumpsbodyworks on Tuesday 27th of November 2012 10:20:15 AM

__________________

"If you don't pass on the knowledge you have to others, it Dies with you"


MARKHAM, ONT

Status: Offline
Posts: 1342
Date:
Permalink  
 

Thanks Guys.

Its a labour of love. I love to get away from the wife and keep tapping away in the garage.

I'll never make a living at it. I'm still trying to get my head around this shaping business 4 years later.

__________________
PUGSY


MARKHAM, ONT

Status: Offline
Posts: 1342
Date:
Permalink  
 

Sorry,

Engine will be a 496 stroker. Sequential fuel injection using an LSx ECM. I got an Edelbrock Pro Flo XT for the top and aluminum GM Performance (read Edelbrock) oval port heads. Will be a mild cam and stock convertor. Looking for a boat load of torque. Horsepower doesn't matter. That's a word that's not in my vocabulary. confuse

I was gonna go with a 6.1 Hemi but I'm a loyal Chevy guy. It hurt enough draggin a Chrysler home and shoving it in the garage. no

So, its pretty good that I've got the Big Three covered on this build. I've also got some Harley Davidson parts going into the build to make sure its really well rounded and I have the best of all the players.


__________________
PUGSY


NIAGARA FALLS, ONT

Status: Offline
Posts: 545
Date:
Permalink  
 

Wow Pugsy!

With those headlights mounted the shape of the front clip looks very sexy! Can't wait to see it back on the car.  Now get back in the shop to get some more work done ... to keep the photos coming.  smilesmilesmile


__________________

Nick M.

A journey in design and fabrication begins with a vision, a single pen stroke ... and in some cases the blow of a hammer.


ONTARIO

Status: Offline
Posts: 4606
Date:
Permalink  
 

123pugsy wrote:

I was gonna go with a 6.1 Hemi but I'm a loyal Chevy guy. It hurt enough draggin a Chrysler home and shoving it in the garage. no

____________________________________________________________________________________________________________________________

Well we can't all be perfect !! LOL  I guess that's the difference between Chevy and Mopar guys. I'm a loyal Mopar guy, and would have a difficult time putting a Chev in my shop.


__________________


MARKHAM, ONT

Status: Offline
Posts: 1342
Date:
Permalink  
 

I'm glad I went with the Chrysler though even if I'm a Chevy fan.

There sure aren't many out there so no one's gonna have the same car. With the custom snout, it'll be a one of a kind so that's even better.

__________________
PUGSY


MARKHAM, ONT

Status: Offline
Posts: 1342
Date:
Permalink  
 

Grumpsbodyworks wrote:

AMAZING ! ABSOFORKINGLUTLY AMAZING!


-- Edited by Grumpsbodyworks on Tuesday 27th of November 2012 10:20:15 AM


 Thanks Grumpy.


__________________
PUGSY


MARKHAM, ONT

Status: Offline
Posts: 1342
Date:
Permalink  
 

invision wrote:

Wow Pugsy!

With those headlights mounted the shape of the front clip looks very sexy! Can't wait to see it back on the car.  Now get back in the shop to get some more work done ... to keep the photos coming.  smilesmilesmile


 Thanks Nick.

Its nice to see a change in the project.

Now I just got to go use the hole I made for the headlight pot to start planishing again. I got about a million hours of metal finishing to do now....no


__________________
PUGSY


CLINTON, ONT

Status: Offline
Posts: 3909
Date:
Permalink  
 

123pugsy wrote:
Grumpsbodyworks wrote:

AMAZING ! ABSOFORKINGLUTLY AMAZING!

------------------------------------------------------------------


x2    You should really get a job doing this   winkwink


__________________


MARKHAM, ONT

Status: Offline
Posts: 1342
Date:
Permalink  
 

427CARL wrote:
123pugsy wrote:
Grumpsbodyworks wrote:

AMAZING ! ABSOFORKINGLUTLY AMAZING!

------------------------------------------------------------------


x2    You should really get a job doing this   winkwink


Thanks Carl.

I'd like to build rods for a living but I got to eat and send a couple of kids thru school.


__________________
PUGSY


BRANTFORD, ONT

Status: Offline
Posts: 2269
Date:
Permalink  
 

Pugsy,

Your right.....I have people tell me all the time to build full time..........but........ People dont want to pay $65-70 p/h

There are only so many whales that can afford too....and I haven't found one yet!

So....like you I build for myself and a select few friends.

You have amazing skills and I wont miss your class next year......gotta love stainless tig work.....amazing absofreeknlutly amazing.

Builders like you make me strive to build better !

__________________

"If you don't pass on the knowledge you have to others, it Dies with you"


WALKERTON, ONT

Status: Offline
Posts: 865
Date:
Permalink  
 

WOW -- I really don't know what else to say. Thanks for sharing. Really gotta love this site!

__________________


TORONTO, ONTARIO

Status: Offline
Posts: 264
Date:
Permalink  


now thats a beautiful looking front end if ive ever seen one

 
 I can offically say Ive been taught by one of the greats


__________________

Smoke tires, not drugs..

«First  <  1 2 3 47  >  Last»  | Page of 7  sorted by
 
Quick Reply

Please log in to post quick replies.


Create your own FREE Forum
Report Abuse
Powered by ActiveBoard